Friday, July 31, 2020

Ok Who Is Looking For A Sale This Weekend!

Happy Weekend Everyone!!!! So glad we are at the weekend!!! So to start off Scrapsalot is having a fabulous sale this weekend!!!!
But before I tell you about that let me show you a super sparkly project with lots of great things you can find in the shop. To begin, I used Catherine Pooler Inks in Sauna, Orange Twist, and Party Dress with a Honeybee Stencil called Geometric Background, and applied my inks with a blending brush. I let this dry. Next I used this adorable stamp set from Sugar Pea Stamps called Jukebox Jive which is a great set with lots of fun images. I stamped my image in Memento Tuxedo Black Ink. I then colored up this fun image with Copics in RV06, YR07, Y15, YG23, B04, and V15. Next I stamped my sentiment, also from the same set with StazOn Jet Black and then used Clear Embossing Powder over the top and hit it with my heat gun, so that the sentiment would stand out more from the jukebox. I then fussy cut my image. I also cut a black card base to 4 1/4 by 5 1/2. And now I came back for the pow part of my background layer. I used the new Stickles Glitter Gel in Nebula over the top and let it dry. I then assembled everything using foam tape.So, what do you think?


Now about that sale, as per Debra, Buy 4 items, get 5th one FREE!!! (Item of equal or lesser value will be free item) **Due to system limitations, only one B4G1 deal per order. Message Debra and we can work your order if you have more than one order!!!
Scrapsalot carries most of these amazing products in the store! You can also check with Debra for availability on specific products,  and while you are there, here is a code for a 10% discount on your order! Just enter JUDY10 at checkout for your discount! Remember, if you don't see it in the shop, email Debra and she can help you with whatever you are looking for!
Stay Well Everyone! More fun projects are coming right up so stay tuned
Hugs,
Judy

One Last One For Christmas In July

Hi Everyone! Ok I had to do one last one for Christmas in July! It seems appropriate that for this last one I amso used up the last of my Merry Mint Sparkle Blend. So without further ado, a smple Christmas shaker card. This is a pretty simple one that you could easily reproduce for making a batch of cards. I am using my Queen and Company Circle Shaker kit and one of the 6x6 Paper Pads from Doodlebug.  Enjoy!


So get ready for the new August Release coming out, and to grab the Sparkle Blends July Release before it is gone, as well as all of the amazing Sparkle Blends, head over to the Sparkle Blends Shop. And, take a look on the Doodles Paper Playground blog, Facebook page and in the Sparkle Blends Fan Club on Facebook to see all the fun things going on!
I do hope you enjoy this project and can't wait to see what you create!

Hugs!
Judy

Who Doesn't Love A Butterfly

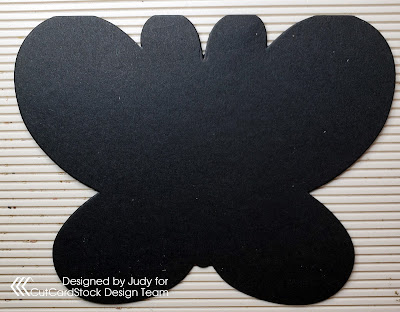
Hi Everyone! Today I am sharing with you a fun and easy project that you can really use for lots of different occasions. You may have seen shaped cards done by people and wondered how they do it. Well, lets dive in and let me give you a few pointers. First, I am using a butterfly shaped card. This is a die set that is designed to be used either as a large layered die cut set or as a shaped card. For my card base I am using the largest die. I am folding my Pop Tone Black Licorice Card Stock in half and positioning the fold inside the top of the die. This way the top of the card will stay attached, giving me my card base.


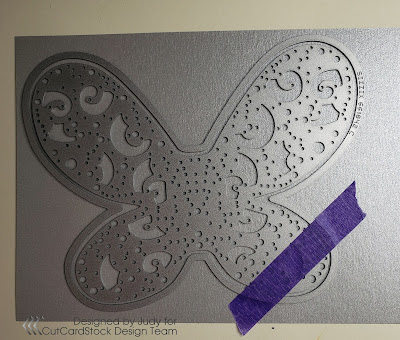
Next, using the second largest die I am going to cut out a shadow layer from Pop Tone Razzleberry Cardstock and using both the same die and the interior die I am going to cut the "fancy" layer using Stardream Metallic Silver Cardstock. Now here is another trick. I personally like to make using intricate dies easier for myself by adding on my adhesive before I die cut. So, take some Scor Tape and place it on the back of what you are going to die cut. So you are adhering one side and leaving the paper on the other then running it through your die cutting machine. It makes it into a diecut sticker in one pass. And now all you have to do is assemble your layers.


I also used the smaller dies using Stardream Metallic Gold Cardstock and following the same technique for the body and antennae and added a touch of lavender bling. So here is the final result. What do you think?


Thanks for stopping by today and I hope you have enjoyed this project!
Hugs,
Judy