Wednesday, August 12, 2020

It Is Time For Challenge #210 With The Crafty Gals Corner!!!!!

Hi All and Welcome to Challenge #210 with the Crafty Gals Corner!  This time the challenge is Summer Time Fun! For this challenge you need to create a project that is Summer Time Fun!  Check out the gorgeous samples from the design team! You can find them all here on the Crafty Gals Corner Blog
Our Sponsors for this challenge are: 
Prize ~ 2 Digital Images
Prize ~ 3 Single Digital Images
Image may contain: text that says 'Twinkle LANE DESIGNS'

Twinkle Lane Designs
Prize: Two Digital Images
 & Two Coordinating Digital Paper Sets 
 For this challenge I got to play with Kate at the Beach from LeAnn's World 101.
This image has been colored up with Copics. And these patterned papers are from Queen and Company. This was such a fun image to color!
 
So we would love for you to play along! Remember this challenge is  Summer Time Fun, so post your image on the Crafty Gals Corner Blog for a chance to win the prizes for this challenge! You can get to the Crafty Gals Challenge blog by clicking here. You have until 11:00 am MST on September 22nd to enter! I can't wait to see what you create! 

Hugs!

Judy

Monday, August 10, 2020

Sometimes You Just Have To Use Your Emoji-nation!

Hi Eeveryone! Today I am really using my Emoji-nation and thinking outside the box. I am playing with Resin and I am having so much fun! I can't wait to show you all of the fun things I have been creating with this months' blends. So check this out.
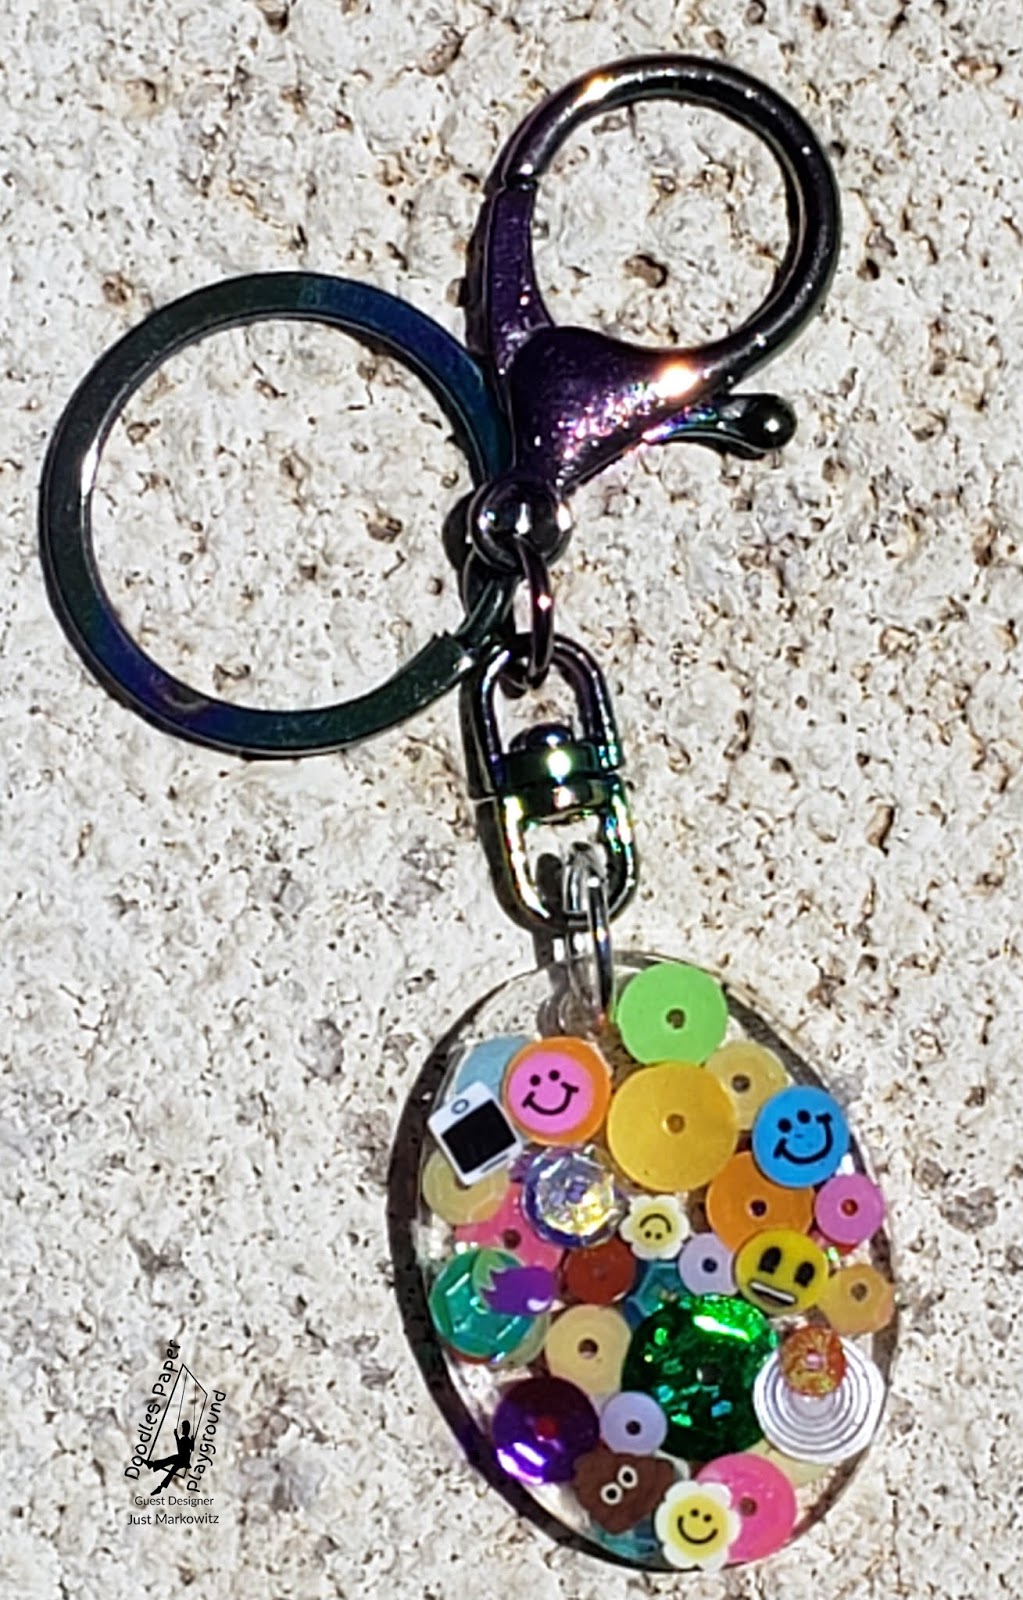
I used Resin to create this super cute keychain using Use Your Emoji-nation Sparkle Blends. This is such a fun blend to create with and I love how you can create layers so that all your sequins are on various levels throughout the resin. I also found this fun multicolored key chain hardware, so after my piece was dry I just had to add a jump ring and then add the hardware.


Make sure you check out the new August Release and grab it before it is gone, as well as all of the amazing Sparkle Blends. So head over to the Sparkle Blends Shop. And, take a look on the Doodles Paper Playground blog, Facebook page and in the Sparkle Blends Fan Club on Facebook to see all the fun things going on!
I do hope you enjoy this project and can't wait to see what you create!

Hugs!
Judy

Soy Happy Together

Hi Everyone! Today I am bringing you a sushi special! This adorable project starts with a Classic Crest Solar White 110 pound cardstock for my card base. For this project I used a die from Waffle Flower Stamps called Sunshine Panel Die. I cut this from Pop Tone Black Licorice Card Stock.
I then used a standard card layer die from Lawn Fan to cut an underneath panel in Pop Tone Wild Cherry Cardstock.Scor Tape.
I then adhered the two layers using
Next I stamped out my sushi images from an adorable stamp set that was part of the Hedgehog Hollow July Kit using Memento Tuxedo Black Ink and my MISTI stamping tool. I then colored up my images using Copic markers.
I then cut out these images and placed them on my card front using Scor Tape. I then stamped out my sentiment also from the same set again using Memento Tuxedo Black and then trimmed the sentiment to my desired size and attached it with Scor Tape. And finally I attached this to my white cardstock base.
I really love how this turned out. I do hope you like this project and as always, I can't wait to see what you create!

Hugs,

Judy

Friday, August 7, 2020

It Is Time For A New Chibi Release At Stampers Delights!

It is the first Friday of the montha dn that means it is time for a new Chibi Release at Scrappers Delights! Take a look at this cutie!
She is such a fun image to color and to create scenes with! I have colored her up with Copics and have used some pattern papers from Queen and Company for my background layers.
She is now available at Stampers Delights in the New Arrivals Section.
You can also find all the amazing images that are currently on sale here.
Be sure to check out the Stampers Delights Inspiration Blog and join us on our Facebook Fan Page. And be sure to check out Stampers Delights!

Hugs,

Judy

Friday, July 31, 2020

Ok Who Is Looking For A Sale This Weekend!

Happy Weekend Everyone!!!! So glad we are at the weekend!!! So to start off Scrapsalot is having a fabulous sale this weekend!!!!
But before I tell you about that let me show you a super sparkly project with lots of great things you can find in the shop. To begin, I used Catherine Pooler Inks in Sauna, Orange Twist, and Party Dress with a Honeybee Stencil called Geometric Background, and applied my inks with a blending brush. I let this dry. Next I used this adorable stamp set from Sugar Pea Stamps called Jukebox Jive which is a great set with lots of fun images. I stamped my image in Memento Tuxedo Black Ink. I then colored up this fun image with Copics in RV06, YR07, Y15, YG23, B04, and V15. Next I stamped my sentiment, also from the same set with StazOn Jet Black and then used Clear Embossing Powder over the top and hit it with my heat gun, so that the sentiment would stand out more from the jukebox. I then fussy cut my image. I also cut a black card base to 4 1/4 by 5 1/2. And now I came back for the pow part of my background layer. I used the new Stickles Glitter Gel in Nebula over the top and let it dry. I then assembled everything using foam tape.So, what do you think?


Now about that sale, as per Debra, Buy 4 items, get 5th one FREE!!! (Item of equal or lesser value will be free item) **Due to system limitations, only one B4G1 deal per order. Message Debra and we can work your order if you have more than one order!!!
Scrapsalot carries most of these amazing products in the store! You can also check with Debra for availability on specific products,  and while you are there, here is a code for a 10% discount on your order! Just enter JUDY10 at checkout for your discount! Remember, if you don't see it in the shop, email Debra and she can help you with whatever you are looking for!
Stay Well Everyone! More fun projects are coming right up so stay tuned
Hugs,
Judy

One Last One For Christmas In July

Hi Everyone! Ok I had to do one last one for Christmas in July! It seems appropriate that for this last one I amso used up the last of my Merry Mint Sparkle Blend. So without further ado, a smple Christmas shaker card. This is a pretty simple one that you could easily reproduce for making a batch of cards. I am using my Queen and Company Circle Shaker kit and one of the 6x6 Paper Pads from Doodlebug.  Enjoy!


So get ready for the new August Release coming out, and to grab the Sparkle Blends July Release before it is gone, as well as all of the amazing Sparkle Blends, head over to the Sparkle Blends Shop. And, take a look on the Doodles Paper Playground blog, Facebook page and in the Sparkle Blends Fan Club on Facebook to see all the fun things going on!
I do hope you enjoy this project and can't wait to see what you create!

Hugs!
Judy

Who Doesn't Love A Butterfly

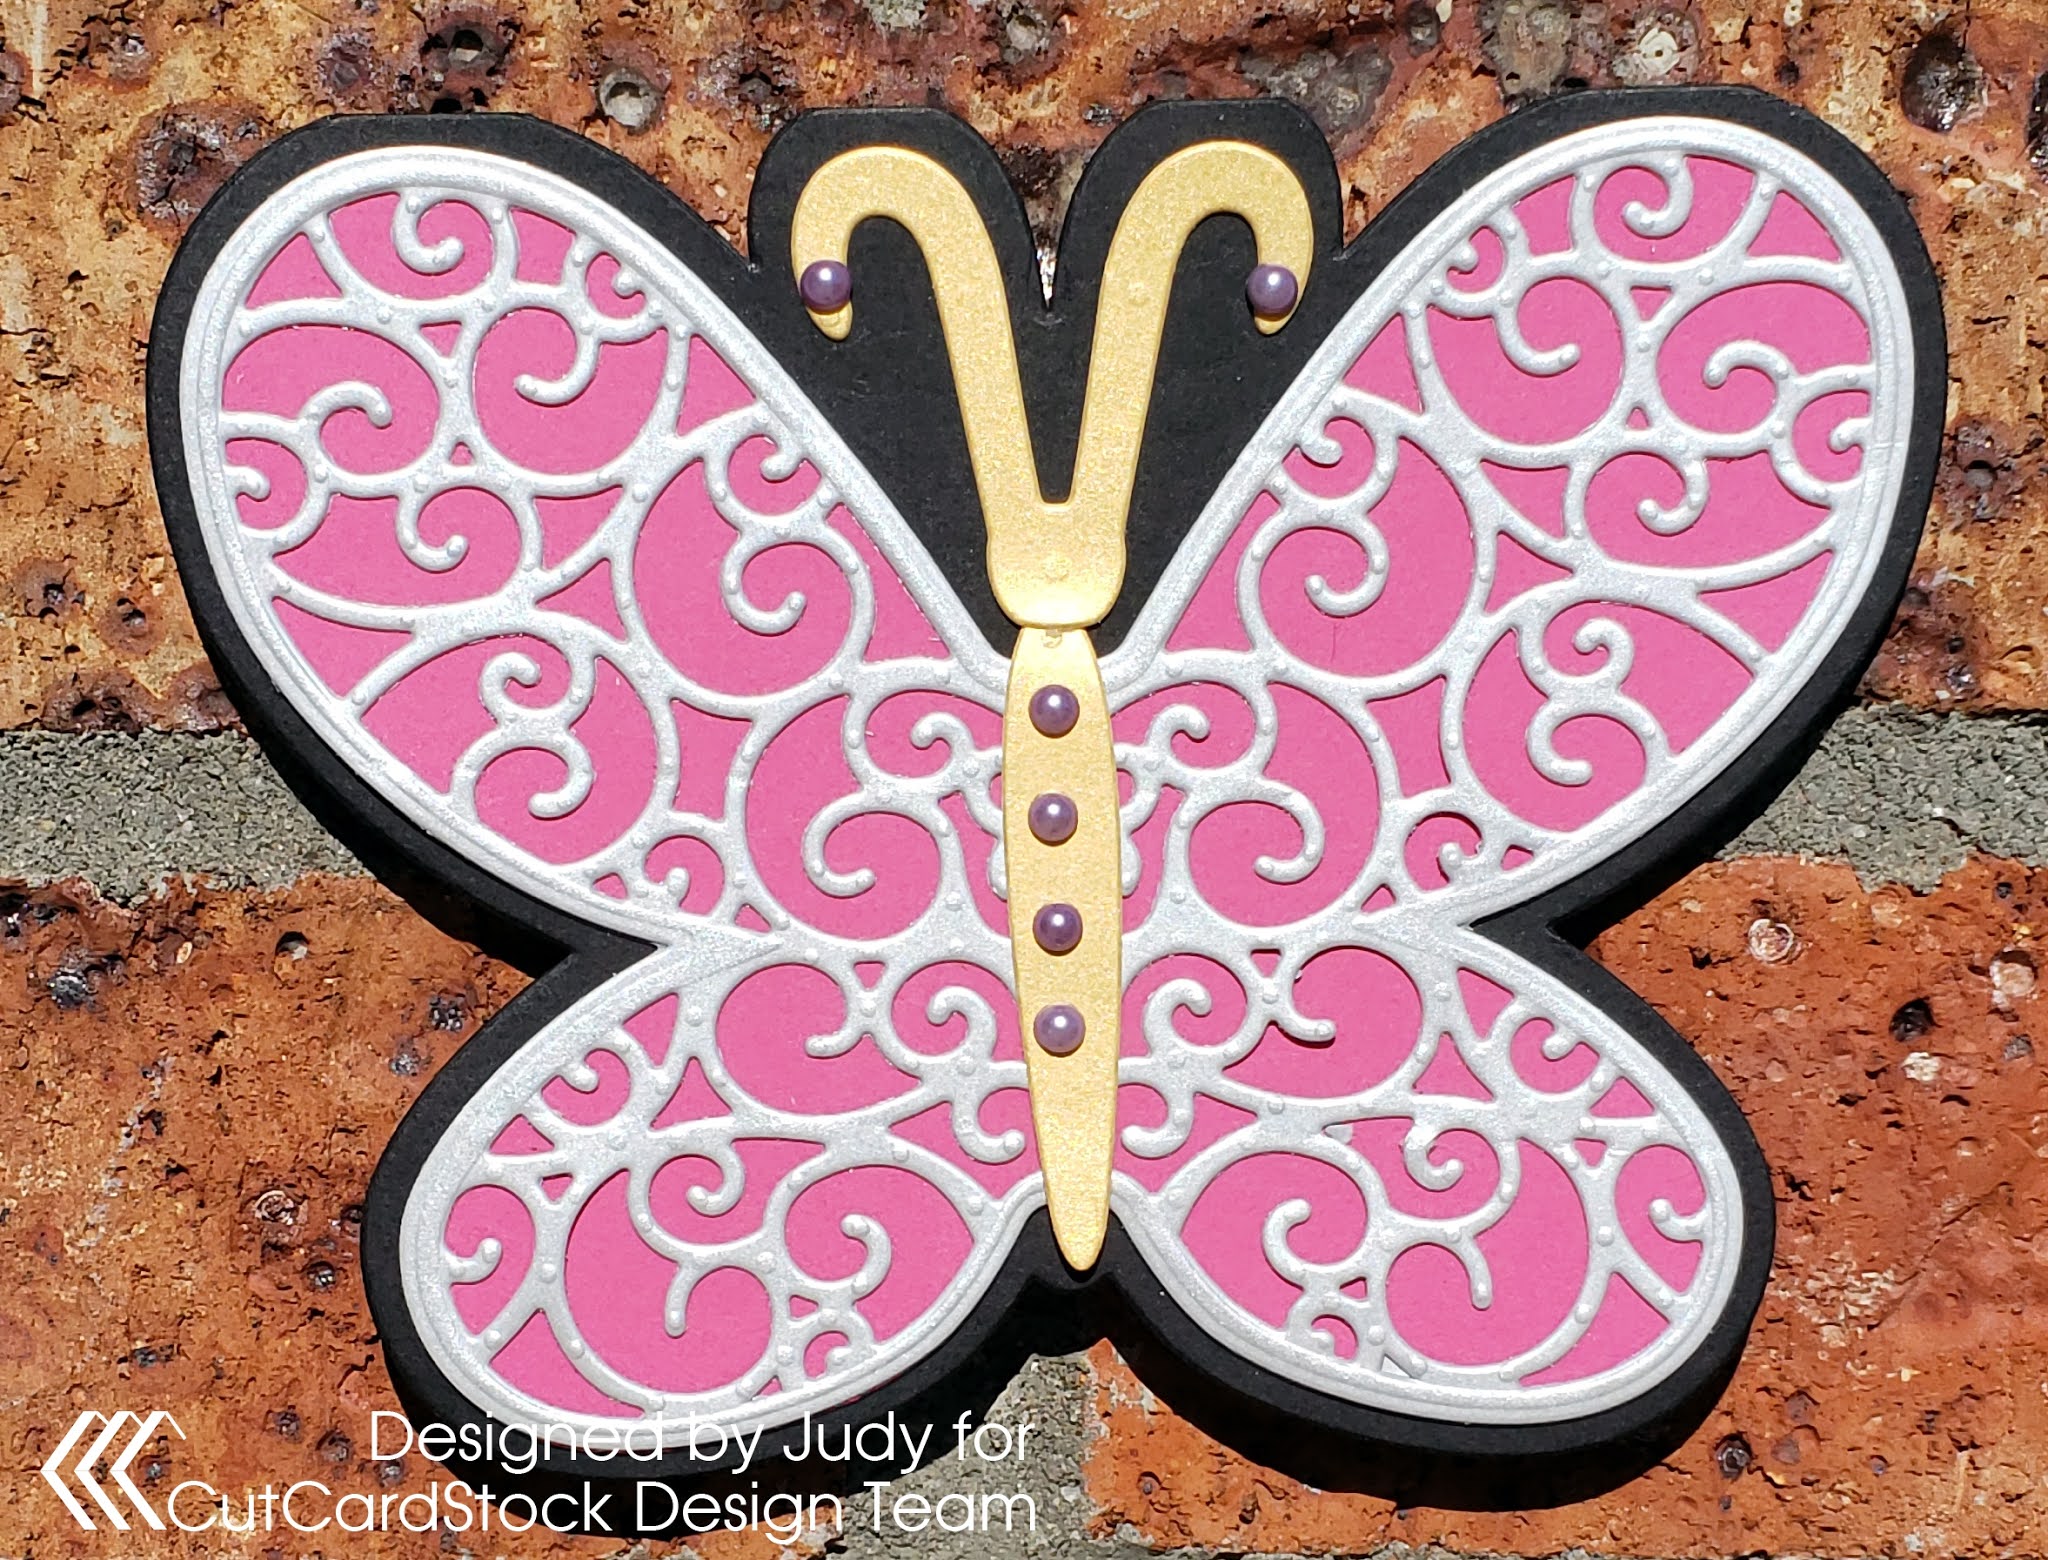
Hi Everyone! Today I am sharing with you a fun and easy project that you can really use for lots of different occasions. You may have seen shaped cards done by people and wondered how they do it. Well, lets dive in and let me give you a few pointers. First, I am using a butterfly shaped card. This is a die set that is designed to be used either as a large layered die cut set or as a shaped card. For my card base I am using the largest die. I am folding my Pop Tone Black Licorice Card Stock in half and positioning the fold inside the top of the die. This way the top of the card will stay attached, giving me my card base.


Next, using the second largest die I am going to cut out a shadow layer from Pop Tone Razzleberry Cardstock and using both the same die and the interior die I am going to cut the "fancy" layer using Stardream Metallic Silver Cardstock. Now here is another trick. I personally like to make using intricate dies easier for myself by adding on my adhesive before I die cut. So, take some Scor Tape and place it on the back of what you are going to die cut. So you are adhering one side and leaving the paper on the other then running it through your die cutting machine. It makes it into a diecut sticker in one pass. And now all you have to do is assemble your layers.


I also used the smaller dies using Stardream Metallic Gold Cardstock and following the same technique for the body and antennae and added a touch of lavender bling. So here is the final result. What do you think?


Thanks for stopping by today and I hope you have enjoyed this project!
Hugs,
Judy